


How to Extend Umbraco v7 with a Custom Tree Menu Item and MVC API - Part 3
Wednesday 15th May 2014, 13:45
Previous parts:
5.1 Making our API More Useful
My task was to connect to a third party database to pickup a list of products and to create any new ones in the Umbraco CMS. You'd probably want to extend this to provide updates to existing nodes too but this is a simple example.
For this example we'll use the Microsoft Northwind database because, after 10 years of being in the industry, it seems about time I did actually use it (seeing as someone has gone to the trouble of creating it for us). http://northwinddatabase.codeplex.com/
Let's create a couple of DocumentTypes in Umbraco – Product Container and a Product. Add properties to match a few pieces of data in the Northwind DB – e.g. for this demo ProductID, Product Name. Unit Price. Ensure you have the relevant structure settings so you can create a Products Container node with the products under them. Create templates so you can see your test products (e.g. with a macro listing all products in the Products container and the products page listing all details).
Make a note of the Node ID of the Products container content node (you can get this from the Properties tab).
If you create some dummy products ensure you give them a Product ID and name otherwise the next bit will fall over.

Product Document Type
Now create the content nodes Products (the container) and one or two dummy child products. Check that this works in your site.
5.2 Connecting to a DB
Let's update the API method to speak to our Northwnd DB GetTestImportProducts(). Update Controller\UmbExtendApiController.cs – ensure you change the parentNodeId to the number that corresponds with your Products Container node. To keep things simple this has been done in classic ADO.NET – never been much of a LINQ fan.
using System;
using System.Collections.Generic;
using System.Data.SqlClient;
using System.Linq;
using System.Net;
using System.Web;
using System.Web.Http;
using UmbExtendAPIControllerProject.Models;
using umbraco.cms.businesslogic;
using Umbraco.Web.WebApi;

namespace UmbExtendAPIControllerProject.Controllers
{
    public class UmbExtendApiController : UmbracoApiController
    {
        ImportProducts myImportProducts = new ImportProducts();
        List<Product> productList = new List<Product>();

        public ImportProducts GetTestImportProducts()
        {
            int parentNodeId = 1057; // Get this from the properties tab in Umbraco of your Products Container (the content node)
            string typeStr = "Product";  // This needs to match your Document Type alias

            // 1. Get a list of all product IDs that we have in the DB with the last Update date.
            var nodes = Services.ContentService.GetChildren(parentNodeId).Where(x => x.ContentType.Alias == typeStr);

            // create a dictionary
            Dictionary<int, Product> dictProducts = new Dictionary<int, Product>();
            // if we have nodes
            if (nodes.Any())
            {
                foreach (var node in nodes)
                {
                    var curProduct = new Product();
                    curProduct.Id = Convert.ToInt32(node.GetValue("productID"));
                    curProduct.Name = node.GetValue("productName").ToString();
                    // extend this for lastUpdated or similar..

                     // add to the dictionary with the ID as key so we can quickly check if it's there already
                    if (!dictProducts.ContainsKey(curProduct.Id))
                    {
                        dictProducts.Add(curProduct.Id, curProduct);
                    }
                }
            }
            System.Threading.Thread.Sleep(2000);  // A short delay to demo the ajax spinner!  TAKE THIS OUT!

            // change this connstr to match your SQL server and NORTWND DB name (perhaps you won't have int. sec. too?)
            string connStr = @"Data Source=.\SQLEXPRESS;Initial Catalog=NORTHWND;Integrated Security=True";
            // When you're happy it's working remove the TOP 10 part so that *all* products are created (bit annoying to delete them all though!)
            string queryStr = "SELECT TOP 10 ProductID, ProductName, UnitPrice FROM products;";

            using (SqlConnection sqlConn = new SqlConnection(connStr))
            {
                SqlCommand cmd = new SqlCommand(queryStr, sqlConn);
                try
                {
                    sqlConn.Open();
                    SqlDataReader reader = cmd.ExecuteReader();
                    while (reader.Read())
                    {
                        // debugging
                        //System.Diagnostics.Debug.WriteLine("\t{0}\t{1}\t{2}", reader[0], reader[1], reader[2]);
                        Product newProduct = new Product { Id = (int)reader[0], Name = reader[1].ToString(), Price = (decimal)reader[2] };

                        // if it's a new product (TODO - check the last updated instead and update o/w)
                        if (!dictProducts.ContainsKey(newProduct.Id)) {
                            string contentName = reader[0].ToString() + " - " + reader[1].ToString();

                            var umbProduct = Services.ContentService.CreateContent(contentName, parentNodeId, typeStr);
                            umbProduct.SetValue("productID", reader[0].ToString());
                            umbProduct.SetValue("productName", reader[1].ToString());
                            umbProduct.SetValue("unitPrice", reader[2].ToString());
                            Services.ContentService.Save(umbProduct);
                            // add to the list for the response - could give the editor a list of new products in the backoffice
                            productList.Add(newProduct);
                        }
                    }
                    reader.Close();
                }
                catch (Exception ex)
                {
                    // TODO - Handle this better
                    System.Diagnostics.Debug.WriteLine(ex.Message);
                }

            }

            myImportProducts.LastUpdate = DateTime.Now;
            myImportProducts.Results = "Import completed successfully";
            myImportProducts.Products = productList.ToArray();
            return myImportProducts;
        }
    }
}
And our Model
using System;
using System.Collections.Generic;
using System.Linq;
using System.Web;


namespace UmbExtendAPIControllerProject.Models
{
    public class Product
    {
        public int Id { get; set; }
        public string Name { get; set; }
        public decimal Price { get; set; }
    }

    public class ImportProducts
    {
        public DateTime LastUpdate { get; set; }
        public string Results { get; set; }
        public Product[] Products;
        public Product[] DBProducts;
    }
}
Let's also tidy up \app_plugins\umbextend\backoffice\umbextendtree\import.html file.
<div ng-controller="UmbExtend.UmbExtendTree.ImportController">
    <div class="umb-pane">
        <h1>Import Products</h1>
        <p>
            Click the button to run the Product Import
        </p>
        <h2>{{importOutput}}</h2>
        <loading></loading>
        <div class="btn-toolbar pull-right umb-btn-toolbar" ng-show="showButton">
            <a href class="btn btn-primary" ng-click="runImport(99)" prevent-default>Run Import !</a>
        </div>
    </div>
</div>
And our Controller \app_plugins\umbextend\backoffice\umbextendtree\umbextend.umbextendtree.import.controller.js
'use strict';
(function () {
    //create the controller
    function umbExtendImportController($scope, $routeParams, $http) {
        //set a property on the scope equal to the current route id
        $scope.importOutput = "";
        $scope.showButton = true;

        $scope.runImport = function (importID) {
            console.log("I have called our REST API");

            // here is where we call our Import REST API
            // $scope.importOutput = "Run Successfully!"

            // $http.get('http://localhost:57601/App_Plugins/UmbExtend/jsontest.html').
            $scope.showButton = false;
            $scope.loading = true;
            $http.get('http://localhost:57601/Umbraco/Api/UmbExtendAPI/GetTestImportProducts').
            success(function (data) {
                $scope.importOutput = data.Results;
                $scope.loading = false;
            });
        }

    };
    //register the controller
    angular.module("umbraco").controller('UmbExtend.UmbExtendTree.ImportController', umbExtendImportController)

    // register the directive for the ajax spinner
    .directive('loading', function () {
        return {
            restrict: 'E',
            replace: true,
            template: '<div class="loading"><img src="/App_Plugins/UmbExtend/ajax-loader.gif" width="64" height="64" /> - PLEASE WAIT...</div>',
            link: function (scope, element, attr) {
                scope.$watch('loading', function (val) {
                    if (val)
                        $(element).show();
                    else
                        $(element).hide();
                });
            }
        }
    });
})();
Drop an AJAX spinner into the /App_plugins/UmbExtend/ajax-loader.gif (there is one in the supplied code download). Now if we click ourRun Import button we should get a success message.
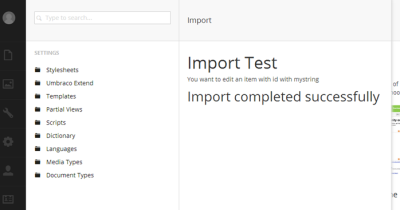
Import Complete
When you go to the Products container in the Content section you may need to reload the nodes (from the right hand mouse button menu). You'll see our new products – note how they are not published, you could do this in code or leave the editor to check and publish.
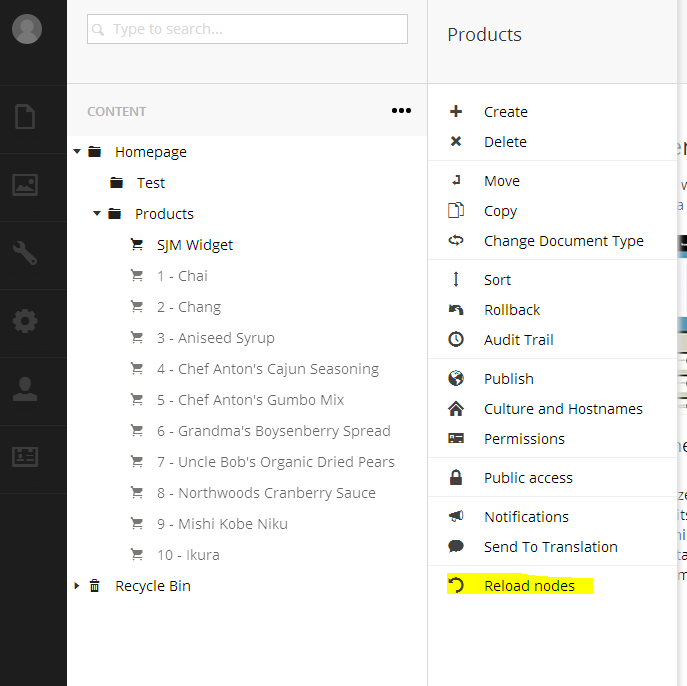
Our New Products
Conclusions & A Warning!
Please note – there is a lot of work still to do to improve error handling (for example a product node without a ProductID will make the code fall over!), everybody loves LINQ – right(?), there is NO security on the API and we really should not be hardcoding node IDs etc. but this example should at least get you started. Good luck!
Further Reading / Credits
I've used the following links to build this example. If you want more examples – see these!
- http://creativewebspecialist.co.uk/2013/07/16/why-i-think-your-doing-it-wrong-umbraco-alttemplate-data-views/
- http://www.nibble.be/?p=224
- http://our.umbraco.org/documentation/reference/management-v6/services/ContentService
- http://www.enkelmedia.se/blogg/2013/11/22/custom-sections-in-umbraco-7-%E2%80%93-part-2-the-views.aspx
- http://our.umbraco.org/documentation/Reference/WebApi/authorization
This guide was produced by Steve Morgan of Siempre Solutions – for more info contact him via http://www.siempresolutions.co.uk
Happy Umbraco-ing!
Code
Here you can download a copy of the code from the tutorial. Simply copy these files into an Umbraco Visual Studio project (take note of the folder structure and ensure that they are added to the project).
 Download Code Sample - umbExtend with API.zip
Comments
If you spot any typos or issues with this tutorial please leave a comment below or email me  steve@SiempreSolutions.co.uk
Name: Shashi Rajapaksha
Date: 1400hrs 30/06/2014
Website:
Hi Steve, thank you very much for the blog, I have followed this blog and another blog to create my test plugin. But there is a issue, in my tree nodes i need different views to load. couldn't find any help . Would you be able to direct me into correct path Thanks Shashi
Name: Антон Старостин
Date: 1334hrs 08/06/2014
Website:
Hi Steve! I wanted to say thank you for your blog! It help me with my problem with custom section in Umbraco 7. I hope you'll write a blog a lot of useful things about Umbraco. Excuse my English, I live in Siberia, Russian Federation and it so hard for me write on foreign language) Regards, Anton

Siempre Solutions Limited is a company registered in England and Wales with company number 09019307
Name: Steve
Interesting problem - you want each tree node to load something different? Why use nodes in this instance - just add different menu items to the context menu? Perhaps I'm not quite understanding your requirements - I'm sure if you post in this in the Our Umbraco forums someone will suggest a suitable a solution though!
Good luck! Steve